How to Insert, Resize, and Format Images in Microsoft Word — Complete Guide (2026)
Microsoft Word makes inserting images easy — it's the formatting part that trips people up. Images jump to random positions, text wraps awkwardly, and resizing distorts the picture. This guide covers everything from basic insertion to advanced formatting, with fixes for the most common problems. Whether you are using Word on Windows or Mac, these step-by-step instructions will help you master document layout with precision.
How to Insert an Image in Word
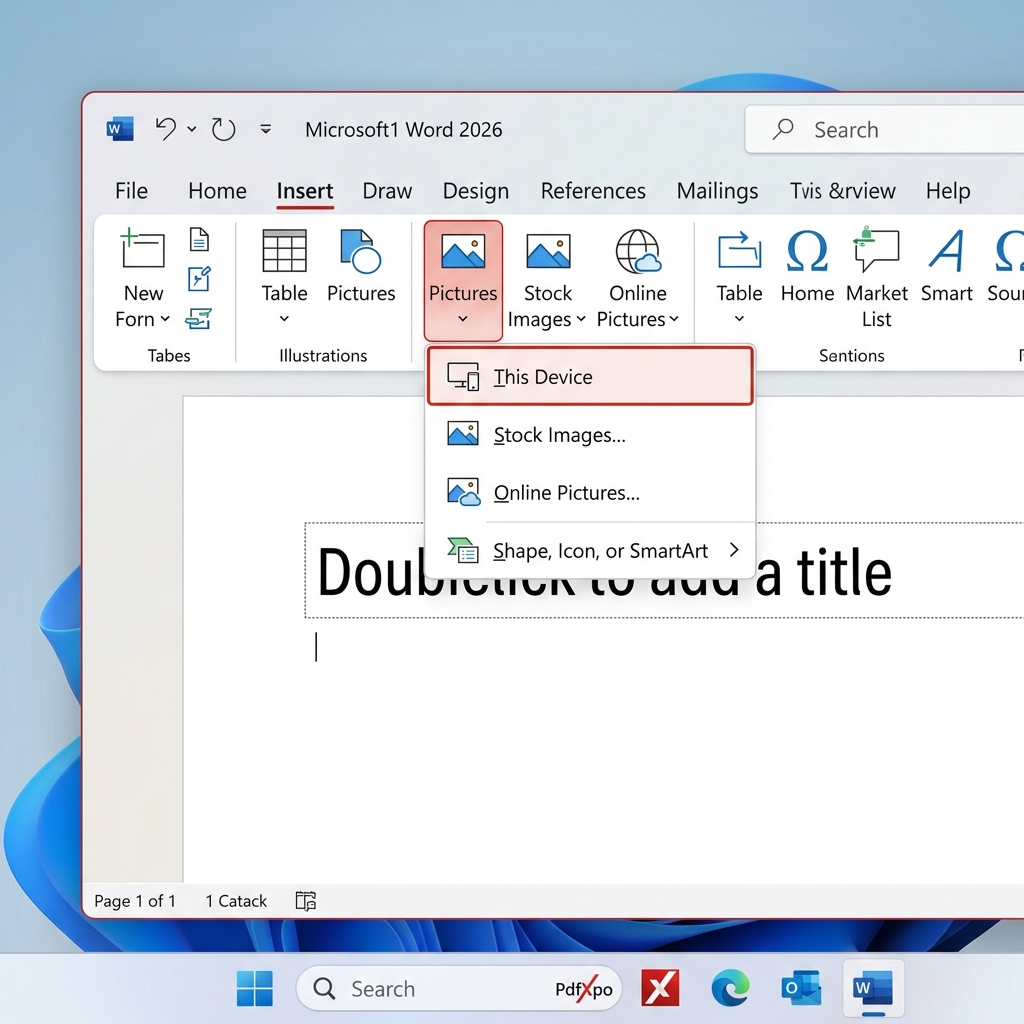
Inserting a picture is the first step in creating a visually engaging document. Word provides multiple ways to bring images into your workspace, whether they are stored locally on your hard drive, found online, or captured as a screenshot.
From your computer
This is the most common method for adding photos or custom graphics to your work.
Online images
If you don't have the right image on your device, Word allows you to search for royalty-free stock photos directly within the app.
Screenshots
Screenshots are essential for technical documentation, tutorials, and reports. Word has a built-in capture tool that saves you from having to use external software.
Resizing Images Without Distortion
One of the most common mistakes in Word formatting is "stretching" an image. This happens when you pull the side handles of a picture, making the subject look unnaturally wide or thin.
The Golden Rule: Corner Handles Only
Always drag the corner handles to resize an image proportionally. Never drag the handles on the top, bottom, or sides unless you intentionally want to distort the aspect ratio.
Pro Tip: By default, Word compresses images when you save the file to reduce the document's size. If you need high-quality prints, go to File > Options > Advanced, scroll to Image Size and Quality, and uncheck "Do not compress images in file."
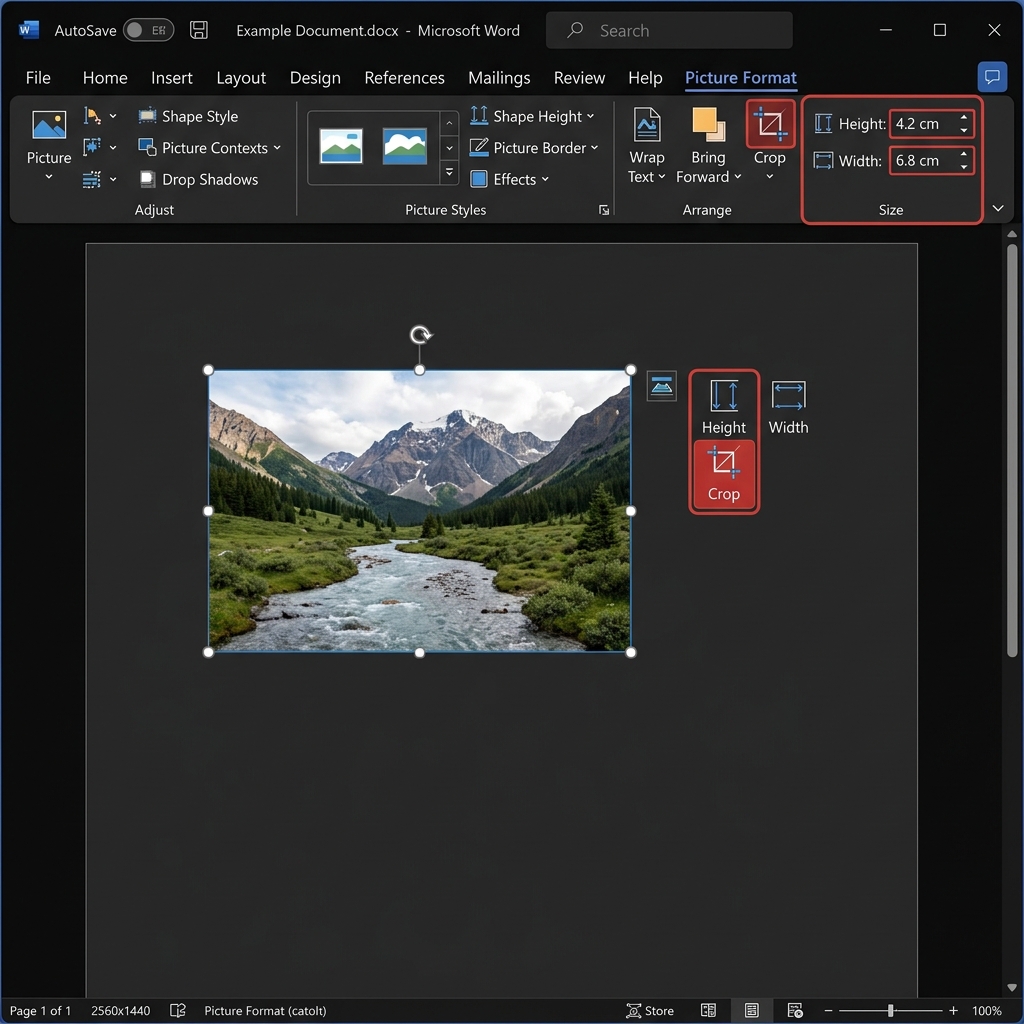
Cropping Images
Cropping allows you to focus on the most important part of a photo while removing unnecessary background clutter.
Important Note: Word doesn't actually delete the cropped areas by default; it just hides them. If you want to permanently delete the hidden parts to shrink your file size, go to File > Options > Advanced and check "Discard editing data."
Text Wrapping — The Key to Image Placement
This is the section most people need. By default, Word treats an image like a giant piece of text. This is why you often can't drag it freely. To unlock your image, you must change the Text Wrapping mode.
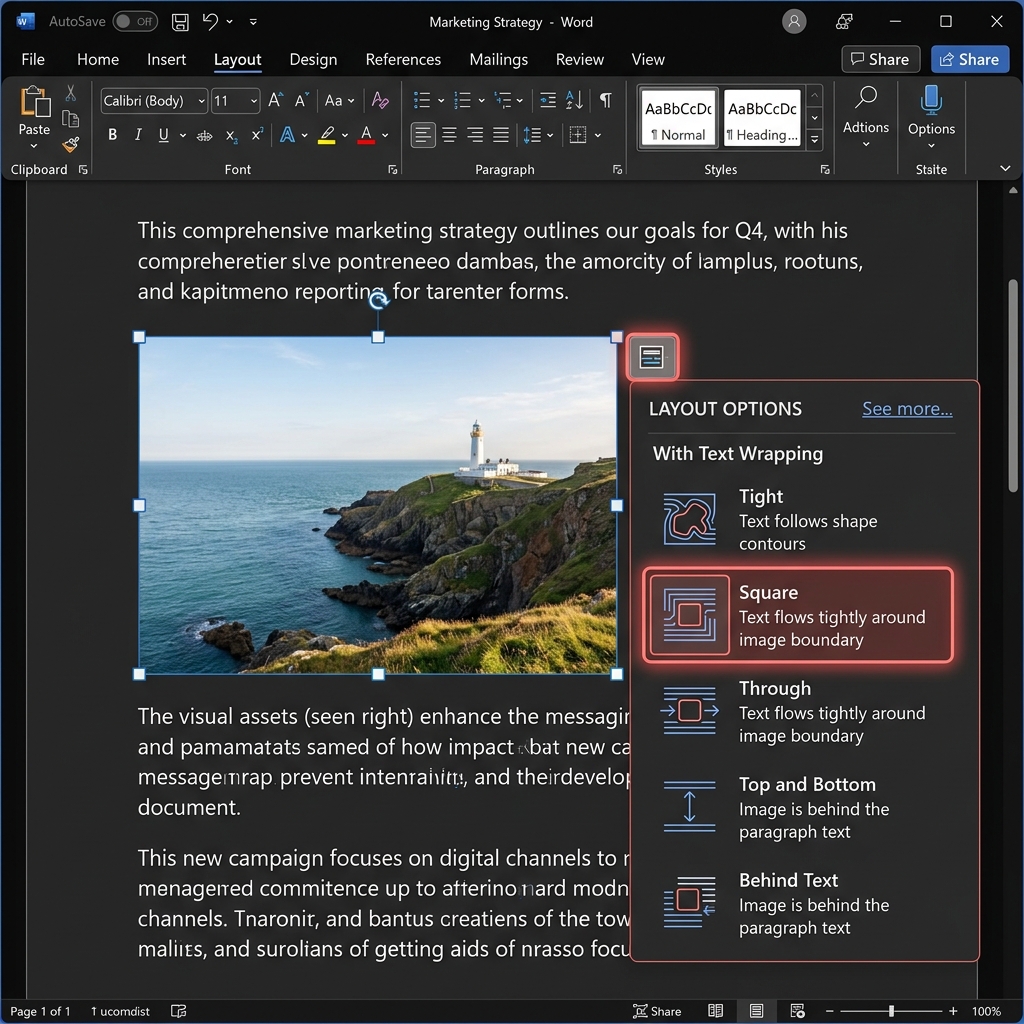
Understanding the Wrapping Modes
How to change it: Select the image and click the small Layout Options icon that appears near the top-right corner of the image. Alternatively, go to the Picture Format tab and click Wrap Text.
Why Images Jump Around (And How to Fix It)
It’s happened to all of us: you add a single sentence of text, and your image suddenly flies three pages down or disappears entirely. This is because every image is anchored to a specific paragraph.
When that paragraph moves, the image moves with it. To fix this:
1. See the Anchor: Select the image (with Square wrapping) and look for a small blue anchor icon in the left margin. This shows which paragraph the image is linked to.
2. Lock Position: To stop the image from moving with text, right-click the image, go to Size and Position, click the Position tab, and check "Fix position on page."
3. Lock Anchor: In the same menu, check "Lock anchor." This prevents you from accidentally dragging the image's anchor to a different paragraph.
Picture Effects and Styles
Word includes a surprisingly powerful set of tools for enhancing the look of your photos without needing Photoshop.
Common Problems and Fixes
From Word to PDF — Preserving Your Images
Once you have perfectly formatted your images, you'll likely want to share the document. Sending a Word file is risky because the recipient might have a different version of Word that shifts your images.
Converting to PDF is the best way to "lock in" your design. Using the Word to PDF tool on PdfXpo ensures that your image formatting, text wrapping, and high-resolution photos are preserved exactly as you see them on your screen.
If the resulting PDF is still too large for emailing, you can use Compress PDF to reduce the file size further without sacrificing image clarity. And if you ever find a PDF with an image you need to edit, use PDF to Word to convert it back into an editable format.
---
FAQ
Q: How do I insert an image in Word?
A: Go to the Insert tab, click Pictures, and select This Device. Choose your file and click Insert. You can also drag and drop images directly into the document.
Q: How do I stop images from moving around in Word?
A: Right-click the image, select Size and Position, go to the Position tab, and check "Fix position on page." Also, ensure you are using Square wrapping instead of "In Line with Text."
Q: How do I resize an image in Word without stretching it?
A: Only drag the corner handles of the image. For even more precision, hold the Shift key while dragging to lock the proportions.
Q: Why is my Word document file size so large after adding images?
A: Word embeds the full resolution of every image. To fix this, select an image, go to Picture Format, click Compress Pictures, and choose a lower resolution (like 150 PPI).
Q: How do I put text in front of or behind an image?
A: Change the text wrapping style to "Behind Text" (to make the image a background) or "In Front of Text" (to make the image float on top). This can be found in the Layout Options menu near the image.
Q: Can I use PdfXpo for images?
A: While PdfXpo is a PDF suite, it works perfectly with Word documents. You can Watermark PDF files for security after converting them from Word, or use the Word tools to manage your documents.